Hey, just a heads up! This post contains Amazon affiliate links, and as an Amazon Associate we earn from qualifying purchases at no additional cost to you. Thank you!
Finding adequate storage is a common issue for all types of campers. There are a few ways to solve this problem: hitch storage, roof boxes, and under-bed storage.
In this article we are going to be talking to under-bed storage, why you should make it happen, and how to do it correctly on the first try.
Why would you want under-bed storage?
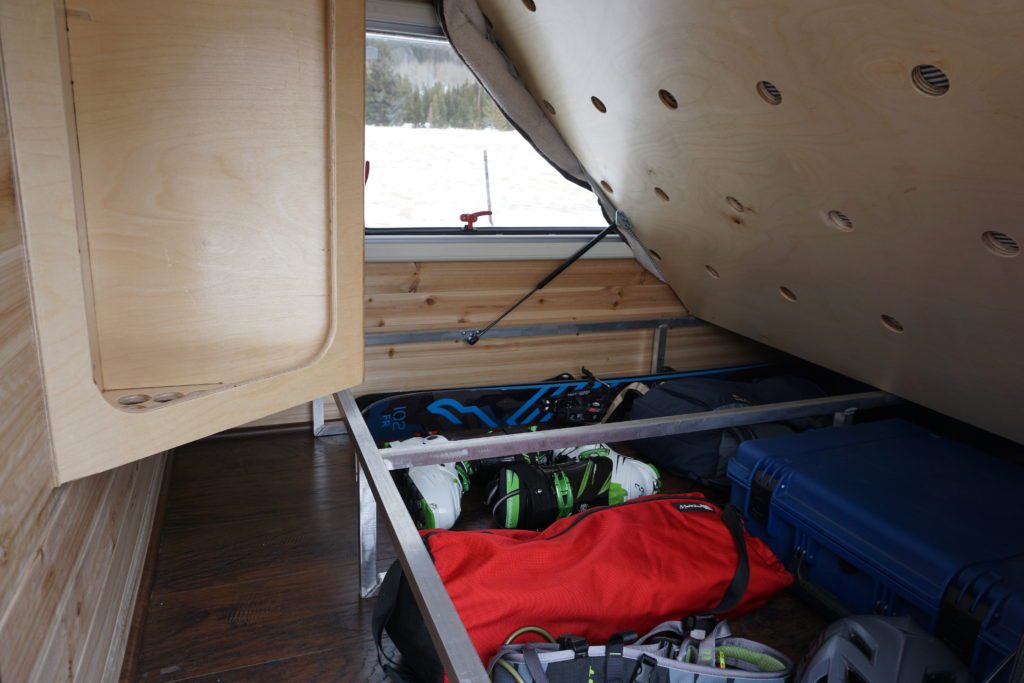
Okay, so why would you want to put things under your bed? That’s normal in your house, but does it make sense in a camper?
Well, there are a few reasons that you might consider adding under-bed storage in your camper by building some sort of bed platform system:
1. Increased Storage Capacity
While this is fairly obvious, many people don’t think about how they could actually use increased storage capacity. Having more storage space allows you to be more prepared for situations you might find yourself in, such as running out of stove fuel or toilet paper (both major bummers).
An additional unique advantage to under-bed storage is the length of the storage. By adding only a few inches of height under your bed you can store longer objects, like skis, that would otherwise be hard tricky to find a spot for.
2. Increased Organization
Most people enjoy living in an organized space (we certainly do), and this aspect becomes exponentially more important when your living space is a fraction of the average living room. Space now comes at a premium, and organization must be increased.
Additionally, under-bed storage is a great vehicle for pull-out drawers to store long and flat objects, such as camp stoves or skis.
3. Raises the bed off of the floor (underrated)
Okay, so this one may be a bit of a nitpick, but it has some concrete benefits.
First, a mattress kept on the ground can easily accumulate condensation, which leads to mold and mildew. Yuck. Nothing like a good ol’ fungus to ruin an expensive camper mattress.
Second, keeping the mattress above the floor helps your bed sheets stay clean for longer by preventing the dirt, mud, and other stuff that walks in with your shoes from ever reaching your sheets.
Third, sitting on an elevated mattress can make your life easier in many ways. One of our favorite benefits is how easy it is to put on our shoes, and a close second is that out cabinets are easier to reach than ever.

Tradeoffs to be aware of:
There are numerous advantages to adding under-bed storage to your camper with only a few drawbacks. However, if done incorrectly, under-bed storage can and will ruin your camper experience, so stay tuned to learn how to prevent this.
1. You’ll lose some head room
Nobody likes to feel claustrophobic in their camper, so it is important to preserve a certain amount of head room when adding under-bed storage. The right amount of head room between the mattress and the ceiling is different for every person, so we suggest that you measure your required head room by following this short process:
- Grab a tape measure, a pencil, and find a flat wall.
- Sit up straight with your back against the wall.
- Make a pencil mark on the wall at the top of your head.
- Move away from the wall and measure the distance from the floor to the pencil mark. Add an inch or two to this number and you will be sure to have enough headroom to avoid feeling claustrophobic in most situations.
2. Storage complexity and difficulty of access can increase
While this could be a non-issue for you, think about how your access to the storage space will look when you have under-bed storage. If it will be difficult to access you may want to only store backup items such as extra fuel and supplies under your bed to reduce the amount you need to access the space.
Designing your storage space
1. Make a list of the things you want to store under your bed
Now that you’ve made the choice to start building some under-bed storage (yay!) it is time to get down to brass tacks.
At this point your goal is to make a list of everything you could possibly want to store in this space. Gear? Spare blankets for unexpectedly chilly nights? Extra TP for when shit hits the fan? Extra batteries for when your headlamp dies and there are spooky noises out?
Spend a day or two pondering the things that you will want to store, since these things will be key drivers of your design.
2. Decide upon a movement mechanism
The next key decision point in your storage journey will be selecting the type of opening mechanism you will use to access your stored items.
Gas struts attached to a hinged panel are extremely popular, reliable, and cost effective. Designing and installing them is a bit tricky. There are some design guides online, but I’ve seen the most success with ordering struts that are slightly over-specced and test-fitting with clamps. There also may be an article coming out on this at some point if there is enough demand!
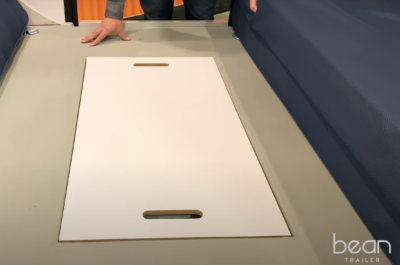
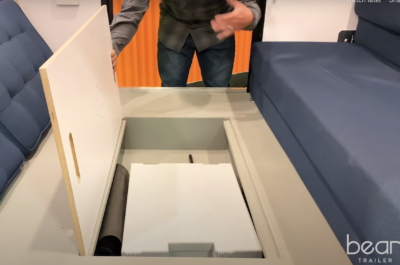
Another common and low cost option is simply to lift your mattress and remove the bed platform panels by hand. This method is commonly employed by teardrop camper companies, like the Bean campers shown below. The drawbacks to this opening method are: decreased accessibility, and possibly having to disturb your mattress and sheets to access your items.
3. Design a frame
Once you have picked the method to access your storage, you will likely need to design a frame to support the bed (unless you have a system similar to the Bean campers and the mattress is on the floor).
It is extremely important to consider any size restrictions in assembling your frame. For instance, we had to weld our frame outside of the camper and bolt the pieces together inside of the camper because we made a queen size bed frame that did not fit through our door or windows.
For frame design inspiration, look at other campers that are following a similar storage concept to the one you are pursuing. We chose to build a square skeletal frame that screws into a wood sleeping platform to keep things simple, keep the storage space open, and to decrease weight.
When selecting materials for the frame you will essentially have two choices: wood or metal.
Wood is extremely accessible and can be done with nearly zero experience. Even better, the only tools you will need are a circular saw and maybe a saw guide.
Metal will be very robust and weigh much less if designed correctly. It also has the advantage of being impervious to rot, but if you have wood rotting inside of your camper you have larger issues at hand than storage. Aluminum can be cut with a miter saw or hacksaw (we have used both), and either welded or fastened together with brackets and screws (we also used both methods in our build).
4. Design a platform top
One of the remaining steps in creating your under bed storage is to design the platform for your mattress. The platform will likely be somewhat stiff/rigid so as to not bend when weight is concentrated in one spot.
In design terms, we have had great success with our method of mounting the rearmost panel to our bed frame, and then attaching another panel to the first panel via a few hinges. This system has proved to be strong, reliable, and easy to open.
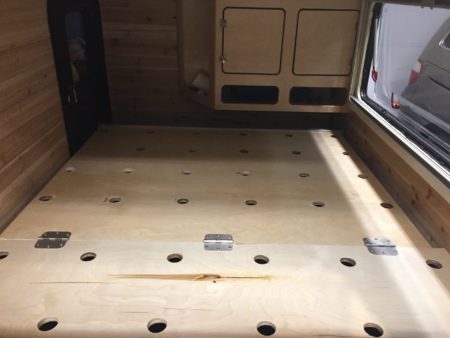
Your platform design will need to mitigate condensation build-up underneath your mattress. Yes, this can and will happen even if your camper is well ventilated, simply due to temperature differences between the mattress and the floor. There are a few ways to fight condensation under a mattress. The least expensive and most time consuming method is to drill a bunch of holes in your sleeping platform to allow air to cycle underneath the mattress. This is the method we went with, and it has been extremely effective. Your other option to fight condensation is placing a specially designed venting fabric, such as “Hypervent Aire-Flow” that increases airflow under the mattress and facilitates evaporation.
As mentioned, your platform must be strong enough to handle some significant weight applied in small areas (200-400lbs in one area when sitting on the platform without a mattress). Materials that can achieve this will typically be wood sheets.
We recommend (and use) ¾” thick prefinished plywood in most cases (as long as you can get it inside of the camper), since it strikes a good balance between cost, ease of building, and strength. With just a single sleeper, or an amply supported platform, you may be able to get away with ½” thick plywood to reduce cost and weight.
Prefinished plywood is a bit pricey, but you can always staple outdoor carpet to a normal sheet of plywood with good results as well.
5. Figure out how to mount the frame to the floor
The last step in your under-bed storage design will be figuring out how you will mount the bed frame to the floor (or wall) of your camper.
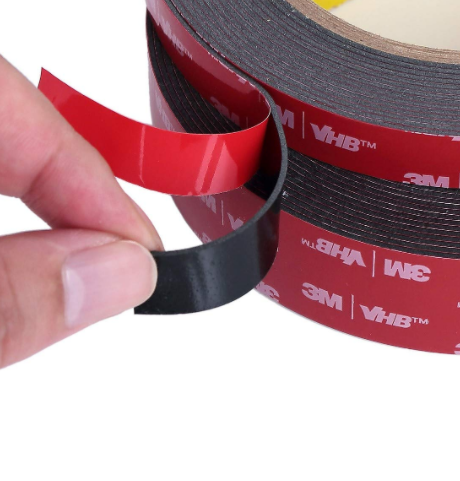
Our frame is metal, so we were able to use this incredible 3M VHB tape to secure our frame to our vinyl planking floor. The tape damps vibration, is easy to remove, and does not require any holes to be made in the floor. Win!
If your bed frame is wood, your best mounting options will likely include some creative combination of right angle brackets and U-bolts. There is also a chance that you might be able to screw right through your platform into the floor!
No matter which fastening method you choose to pursue, make sure that you can remove your frame without too much trouble, since you will likely need to do so for one reason or another.
6. Create and Install!
So, that’s all of the design work you need to do! Phew, it feels like a lot, but you will thank yourself for taking care of the hard work in the beginning. Now you get to do the fun part!
If you are building a metal frame, you may need:
-Drill
-Impact Driver
-Holesaws
-Aluminum: Miter saw (expensive) or hacksaw (budget)
-Steel: Abrasive cut-off saw (expensive) or angle grinder (budget)
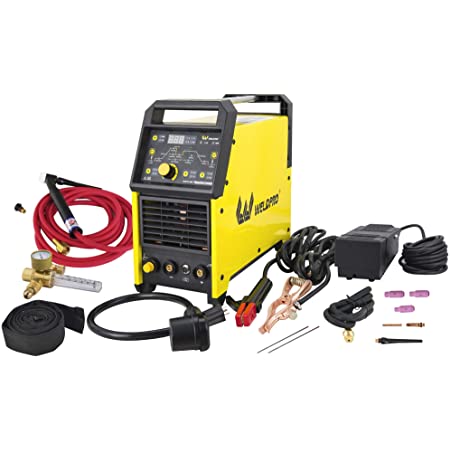
-MIG, TIG, or Stick welder
If you are building a wood frame or platform, you will need:
-Miter saw (expensive) or circular saw (budget)
-Drill
-Impact Driver
-Holesaws
Our fabrication processes tips and tricks pages have incredibly useful information for beginners and veterans alike – check them out!
How we built our under-bed storage
Design:
We went through multiple iterations on the design, and ultimately ended up pursuing a simple platform that is lifted gas strut. The platform rests on an aluminum square tube frame, and the front ⅔ of the platform lifts up for access to the gear beneath.
We went with this design for several reasons, but the main decision points were: reliability, ease of lifting, and ease of access to our items.
This design will never fail us, is pretty easy to lift, is lightweight, and provides ample access to our items. In addition, the building materials can be relatively low-cost (~$400 all-in), so this design seemed like a no-brainer.
Yes, cost for this build could be significantly reduced (Probably sub-$200) by using lower quality materials for the frame (such as unfinished plywood, or MDF), but we knew we were not going to be happy with the look, feel, weight, or durability of said materials. And hey, the whole point of the project was to build a durable camper that we enjoyed anyways, so the cost was justified.

Fabrication Details:
Materials:
- 1” 6061T6 Aluminum square tubing with a ⅛” wall thickness
- 2 – (4ft x 8ft) ¾”-thick prefinished Baltic Birch plywood
- 3 – Home Depot hinges
- 2 – 20-inch, 30lbs gas struts
- 2 – L-brackets for gas struts
- 2 – Flat brackets for gas struts
Tools:
- Drill (for drilling all sorts of holes)
- Impact driver (for installing self-drilling metal screws and other hardware)
- Holesaw kit (for cutting holes in platform to prevent condensation buildup)
- 12” miter saw (for cutting aluminum tubing to length and cutting 45 degree miters)
- High-tension hacksaw w/ 24T blades (for lowering platform height when we realized we made it too tall)
- TIG welder (we were able to get away with a 120V power supply for this welding application)
- Set of files (for deburring and cleaning miter cuts before welding)
Photos:


Share your build pictures with us to be featured on our Instagram!
We created this website with the goal of inspiring you to go out and build the camper of your dreams. If you build something cool, we’d love to see it! Please reach out through our Instagram!

